
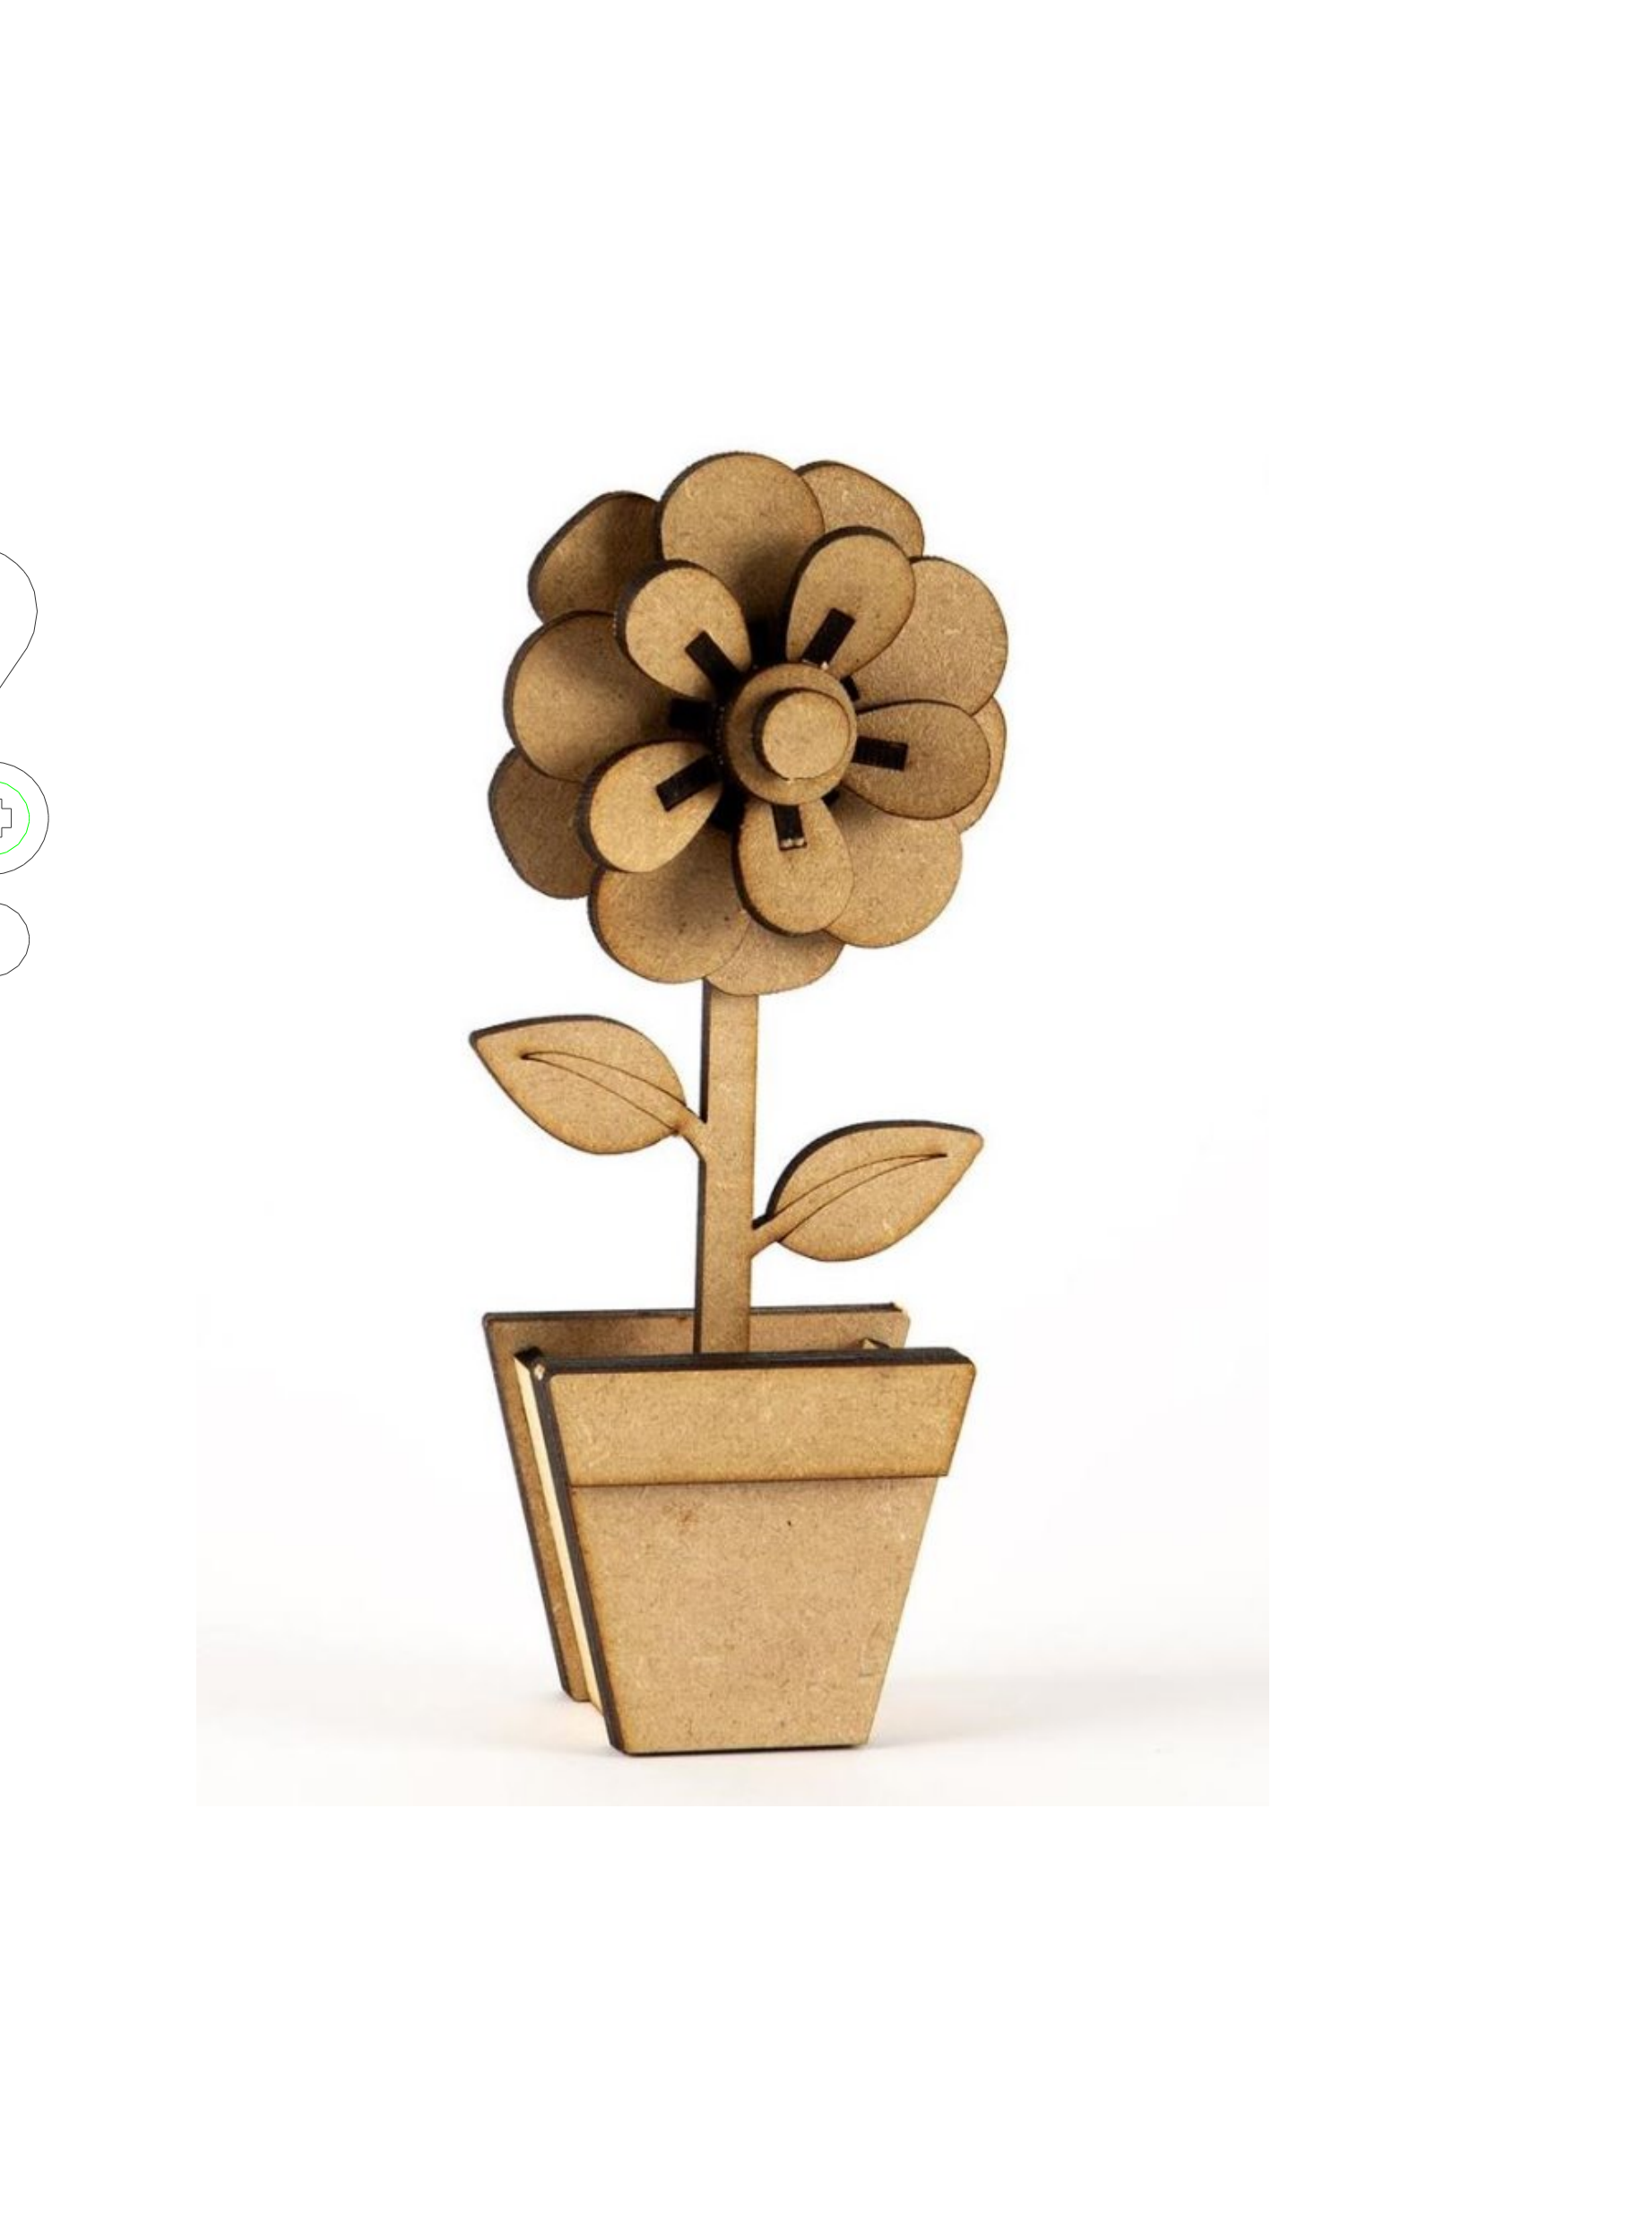


木质花朵盆栽
Flower Pot Wooden Craft
从一块木板到一盆盛开的立体花朵。花盆与花朵全部通过激光切割成型,插接 / 榫卯结构拼装,无需胶水,只靠精确的槽口配合即可完成。
From a single board to a blooming wooden flower pot. The pot and flowers are laser-cut and assembled purely with slots and tabs—no glue, just precise joinery.

产品概述
Product Overview花盆花朵一体
Pot & Flower in One
花盆与花朵零件同版排版,从同一张板材上一次性切割完成,整体成型。
Pot and flower parts share one layout, cut from the same board in a single pass.
多层立体花球
Layered 3D Bloom
外层大花瓣、内层中花瓣与花蕊层层叠加,构成饱满立体的花球造型。
Outer petals, inner petals, and the core stack up into a full, dimensional bloom.
插接榫卯结构
Slot-and-Tab Structure
所有零件通过插舌与槽口精确配合,无需胶水或螺丝即可牢固拼装。
Every part joins with tabs and slots—no glue or screws needed for a firm build.
亲子友好手工
Kid-Friendly Craft
步骤清晰、零件数量适中,适合家长与孩子一起完成,培养动手能力。
Clear steps and a moderate part count make it a great parent-child project.
所需材料
Materials Needed椴木 / 杨木胶合板 3 mm Basswood / Poplar Plywood
约 A4/A3 大小 1 张,厚度 2–3 mm,颜色浅、纹理细腻,激光切割边缘干净。
One sheet about A4/A3, 2–3 mm thick, light color with fine grain for clean cuts.
180-220 目砂纸 180-220 Grit Sandpaper
轻轻打磨激光切割边缘和表面焦痕,让手感更顺滑。
Smooth cut edges and burn marks for a nicer finish and feel.
激光切割保护膜 Laser Mask (Optional)
贴于板材表面,减少切割烟尘附着,保护木面光洁。
Applied to the board to reduce smoke marks and keep the wood surface clean.
木蜡油 / 清漆 Wood Wax Oil / Varnish
组装完成后整体喷涂,增强质感与耐久性,让花朵更温润。
Finish the assembled pot with wax oil or varnish for a warmer, more durable look.
可能用到的工具
Tools You May Need零件清单
Parts List花盆与花朵零件同版排版:左侧为矢量切割图纸,右侧为模拟真实切割后摆放在一起的木质零件。
Pot and flower parts share one layout: the left is the vector cutting plan; the right shows real-looking cut wooden parts laid out together.
📐 矢量切割图纸 · Vector Cutting Plan

🪵 真实切割零件 · Real Cut Parts

| 编号 No. |
零件名称 Part Name |
数量 Qty |
说明 Description |
|---|---|---|---|
| A | 花盆梯形外壳 Pot Trapezoid Shell |
2 | 大梯形面板,构成花盆前后侧面 Large trapezoid panels forming the pot front and back |
| B | 带槽梯形面板 Slotted Trapezoid Panel |
2 | 带 4 个长槽孔,用于插接侧板连接件 Four long slots for the side connectors |
| C | 花盆侧板连接条 Pot Side Connectors |
2 | 长条形带缺口,连接前后 / 左右面板形成四棱锥台 Long strips linking panels into the tapered pot body |
| D | 花盆上口固定块 Rim Fixing Blocks |
2 | H 形与方形各 1,固定花盆顶部边框 Top rim blocks for a firm pot opening |
| E | 花盆底部装饰条 Pot Base Trim |
2 | 长条梯形,封闭盆底并起装饰作用 Seal and decorate the pot bottom |
| F | 主花茎 Main Stem |
1 | 长杆状,顶部圆形,插入花盆支撑花朵 Long stem that holds the flower in the pot |
| G | 带叶短茎 / 花头托 Leaved Short Stem |
1 | 短杆带 2 片一体叶子,用于承托花头 Short stem with two leaves to carry the bloom |
| H | 独立叶子 Loose Leaves |
2 | 可插接到主茎或短茎上,增加叶片层次 Add extra leaf layers to the stems |
| I | 大花底座 Bloom Base |
1 | 五瓣花形平板,作为花朵最底层支撑 Five-petal base plate supporting the bloom |
| J | 外层大花瓣 Outer Petals |
5 | 水滴形带插舌,插入底座形成最外层花瓣 Teardrop petals with tabs for the outer ring |
| K | 内层中花瓣 Inner Petals |
5 | 较小水滴形,插入中层形成第二圈花瓣 Smaller teardrop petals for the second ring |
| L | 内层花托 / 小花瓣 Inner Sepals |
5 | 异形带缺口,承托中心花蕊 Notched pieces supporting the flower core |
| M | 十字花心片 Cross Core Pieces |
5 | 小型十字件,层层叠加构成花蕊细节 Small cross pieces stacked into the stamen |
| N | 花蕊圆盘 Core Disc |
1 | 中心带十字孔的圆形片,固定花蕊 Round disc with a cross hole locking the core |
| O | 花蕊圆片 Core Cap |
1 | 普通圆形片,封顶或垫底 Plain round piece capping or padding the core |
| P | 花茎固定夹 Stem Clips |
2 | U 形 / 异形夹片,将花朵固定到茎顶端 Clips mounting the bloom onto the stem top |
组装步骤
Assembly Steps清点与打磨
Inventory & Sanding
按零件清单清点花盆与花朵全部零件,用砂纸轻磨所有切割边缘,确保插接顺滑。
Count all pot and flower parts; lightly sand every cut edge for smooth fitting.
组装花盆
Build the Pot
将 2 块大梯形外壳作为前后侧面,带槽面板作左右侧面,用侧板连接条与底部装饰条固定成四棱锥台,最后安装上口固定块。
Join the two large shells and slotted panels with connectors and base trims into the tapered pot, then add the rim blocks.
组装花朵
Build the Bloom
大花底座上依次插入外层大花瓣、内层中花瓣与花托,再叠加十字花心片、花蕊圆盘与圆片,构成立体花心。
Insert outer petals, inner petals, and sepals into the base, then stack the cross pieces and core discs.
固定花头
Mount the Bloom
用 2 个花茎固定夹将花朵底部夹紧,安装到带叶短茎顶端。
Clip the bloom bottom with the two stem clips and mount it on the leaved short stem.
插入主茎
Insert the Stem
将主花茎垂直插入花盆中心,再把带叶短茎插到主花茎顶端,补插独立叶子。
Push the main stem into the pot center, attach the leaved stem, and add the loose leaves.
调整定型
Final Adjust
检查所有插接处是否牢固,调整花瓣角度使造型饱满,完成整盆花朵盆栽。
Check every joint, spread the petals for a full look, and finish the flower pot.
儿童手工时光
Kids Craft Time花朵盆栽是爸爸和孩子一起完成的好项目。从认识零件、打磨木料到插接拼装,每一步都能让孩子感受手工的温度与成就感。
Building the flower pot is a great parent-child project. From identifying parts and sanding wood to slotting pieces together, every step brings warmth and a sense of achievement.

📖 研究图纸 · Study the Plan
孩子先对照图纸认识每一块零件,说说花瓣、花蕊和花盆分别在哪里。
The child studies the plan, finds the petals, the core, and the pot, and learns each part.
🤲 协作插接组装 · Hands-On Assembly
孩子负责递零件、对准插槽,爸爸辅助按压固定,默契配合。
The child passes parts and aligns slots while dad helps press and fit them.


🌸 绽放成果 · Bloom the Result
当立体花朵在花盆中绽放,孩子的笑容和花一样灿烂。
As the 3D bloom opens in the pot, the child's smile shines just as bright.
成品效果
Final Result
🪴 桌面绽放 · Desk Bloom
完成后的立体花朵盆栽呈自然原木色:花盆为四棱锥台,花朵由多层花瓣叠加成立体花球,叶片从茎部自然展开,简约而温馨。
The finished pot shows natural wood tones: a tapered pot, a layered 3D bloom, and leaves spreading from the stem—simple and warm.
- 🌿 原木质感,纹理温润 · Natural wood texture
- 🌸 多层花瓣,立体饱满 · Layered, full 3D bloom
- 🧩 全插接拼装,无需胶水 · Glue-free slot assembly
- 🎁 适合桌面装饰或手工礼品 · Desk decor or handcrafted gift
注意事项
Tips & Safety厚度匹配 · Slot Fit
插槽宽度要与板材厚度精确匹配。建议先用废料试切,确认松紧后再批量切割。
Slot width should match board thickness. Test cut with scrap first to confirm the fit.
切割参数 · Cut Settings
以 3 mm MDF 为例,功率 60–90%、速度 10–20 mm/s,需切透且边缘不发黑。
For 3 mm MDF: power 60–90%, speed 10–20 mm/s, cut clean without charring.
儿童监护 · Adult Supervision
激光切割机、美工刀等工具需由成人操作;孩子可参与打磨、插接等安全环节。
Laser cutter and knives are for adults; kids can join safe steps like sanding and fitting.
表面处理 · Surface Finish
打磨时顺木纹方向轻擦;涂木蜡油后静置 24 小时,彻底干燥再摆放使用。
Sand along the grain; let the wax oil dry for 24 hours before displaying.